The crafty crow is a wonderful blog which focus's on all kind of crafts to do with your families and my rythum sticks made it!!!!
So if you haven't popped over to crafty crow yet in your blog travels, go take a look now. It's a fabulous craft blog!!! Her button is in my side bar too for easy access! Enjoy and happy creating!
Tuesday, March 31, 2009
Monday, March 30, 2009
Sweet Sunflowers
Here a simple but cute craft to try.

Supplies you will need:
Yellow construction paper
Tape (I used green masking tape)
Scissors, writing utensil like pen, pencil, marker, glue stick
A small twig/branch
Green and yellow feathers
Sunflower seeds
Clay pot or other small container (you could recycle a yogurt container, or small tin)
Playdough (not pictured in supplies photo....sorry)
Circular object about 5-6inch in diameter
 1) Gather your supplies.
2) Trace around a circular object onto the yellow paper. I chose to trace around our green masking tape as it was a good size. You need to trace 2 circles and cut them both out.
 3) Glue around the edge of one circle. Now carefully place the yellow feathers into the glue circle. Be careful not to get the glue on your fingers or you will turn into a yellow feathered birdie!
 4) Cover the second circle with glue and firmly press it down on top of the feathered circle you just finished.
 5) Cover that top circle with glue. Put it on really thick. Now press your sunflower seeds into the glue.
 6) Allow the glue to dry. Turn your flower over and secure it to a twig using the green masking tape.
 7) Turn the flower over, and tape on another smaller twig or two to be the branches. Tape the green feathers on to be the leaves.
 8) Now take your pot and place a clump of paydough in the bottom. (I used playdough that was getting old instead of bran new playdough.) Sierra decided to plant a little seed in her dough soil too, then she pretended to water it to wait for it to grow. (Love her imagination!)
 9) Next pick up your flower, press it into the dough soil. You may need to press the dough into the branch so it stands straight and is more secure.
 10) Now you have a beautiful sunflower! (ours is headed to the nature table)
We also made a simple daffodil from yellow paper, muffin liners, and paint. Then put it together in the same way as stated above.
 I also found this sunflower project going on. I am not sure if Canada can join but I am inquiring and if we can, we will.
We will be building one of these sunflower sunrooms this year too! What a great way to study the growth of sunflowers, discover bees, and other birds and animals who will use the sunflowers, provide a fun place to play, and yummy snack to eat! The learning just keeps growing and GROWing and GROWING!
I hope you have fun with these ideas. Leave a comment and let me know how your project went, or any other great ideas you have for sunflowers.
Etsy shop opened!!!
I finally got around to trying my luck out on Etsy. I like to make things but the trouble is, I usually only make things as gifts or for myself. I am a jack of all trades so I have a problem with settling down and perfecting one craft! There's too many out there to choose from!
View my shop here!
I only have 2 crowns listed. I have a few more in different colours I will list in a bit. These are crowns I have are left over from an Early Childhood conference I attended with Meadow in February. I am by no means an excellent sewer but these crowns are loved by Sierra and Aayla, and a few of our friends, and hopefully your little ones might like one too!
They are made from wool felt. They do have jewels sewn on so they are not intended for children who still mouth their toys. They have a single piece of ribbon sewn in for a tie. This ribbon tie, allows the crown to be one size fits all from toddler to adult! They are wonderful to use with your play silks for princess, prince and other imaginative play. Sierra is just coming to the age where she like to dress up and play make believe and it is so much fun to watch her imagination develop.
Here's a picture of Sierra with hers.

Sunday, March 29, 2009
Sicko Sierra and intro to our first nature table
It's been a long week. Sierra has been sick for about 5 days now. She has never had the flu and it was hard for her to understand what was happening to her. I feel so helpless as a parent trying to explain to a 2 1/2 year what is happening to her poor little body, and there is nothing mommy can do to make her gurgling belly stop, but cuddle together and wait it out!
Today there is a bit of hope, as she is in much happier spirits but still not feeling good. I decided to break out the set of wooden Brown Bear Brown Bear toys I bought from mamakopp which I was going to save for her birthday. She adores that story. It is so fun to watch her read it to her little sister. But she's been so sick and so good about it, I thought she needed a little treat!
She has been snuggling up on this bed in our spare room/craft room alot this weekend. (Really though her favourite spot has been in her daddies arms. He has been her biggest source of comfort.) Please excuse the quality of the photo. Sierra hates her picture taken lately and with her being sick I didn't want to push her for a great shot.

She had fun with a set of owls that mamakopps son Lucas made. (Sierra calls them kitties which I think is cute) She enjoyed matching all the colourful animals from the Brown Bear story to the coloured animals Lucas made.
I am also posting a picture of my current project. I am trying to put together a nature table. I think nature tables are a wonderful way to bring the outside in. I am very intrigued by the the Waldorf philosopy lately and have been spending any spare moments I have looking for good websites about Waldorf. If you have any sites to recommend please leave them in the comments section or email me at siaylaaa@gmail.com.
I found a green scarve at a thrift store to use as the grass until I get a green silkie. This picture is just the begining, a hint of what is to come as the table we are using is the top of an old dresser I store my material, wool felt, embroidery and sewing stuff in and is about 5 feet long. My current project though is my first big needle felting venture and I think it is turning out OK.

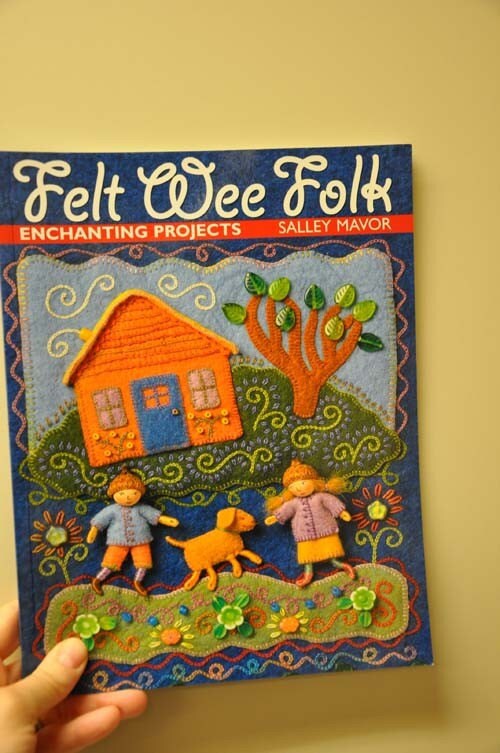
It will have removable leaves so it can change with the seasons, it's my version of this one from Manyharmonytrees on Etsy. (I just bought this book from her and can't wait for it to arrive.) I have a long way to go with finishing my tree but it's a glimpse into our first nature table. The wooden animals pictured are from mamakopp, as are the mushrooms. The pine trees are from a dollar store find, the crystal I received in a wonderful swapbot swap months ago, and the curly knotted wood was a recent beach walk.
Hopefully this week when Sierra is feeling better we can go for a walk to to collect some items for our table, and then we'll post some finished pictures. Until then, I hope all is well, enjoy the rest of your weekend.
Today there is a bit of hope, as she is in much happier spirits but still not feeling good. I decided to break out the set of wooden Brown Bear Brown Bear toys I bought from mamakopp which I was going to save for her birthday. She adores that story. It is so fun to watch her read it to her little sister. But she's been so sick and so good about it, I thought she needed a little treat!
She has been snuggling up on this bed in our spare room/craft room alot this weekend. (Really though her favourite spot has been in her daddies arms. He has been her biggest source of comfort.) Please excuse the quality of the photo. Sierra hates her picture taken lately and with her being sick I didn't want to push her for a great shot.

She had fun with a set of owls that mamakopps son Lucas made. (Sierra calls them kitties which I think is cute) She enjoyed matching all the colourful animals from the Brown Bear story to the coloured animals Lucas made.
I am also posting a picture of my current project. I am trying to put together a nature table. I think nature tables are a wonderful way to bring the outside in. I am very intrigued by the the Waldorf philosopy lately and have been spending any spare moments I have looking for good websites about Waldorf. If you have any sites to recommend please leave them in the comments section or email me at siaylaaa@gmail.com.
I found a green scarve at a thrift store to use as the grass until I get a green silkie. This picture is just the begining, a hint of what is to come as the table we are using is the top of an old dresser I store my material, wool felt, embroidery and sewing stuff in and is about 5 feet long. My current project though is my first big needle felting venture and I think it is turning out OK.

It will have removable leaves so it can change with the seasons, it's my version of this one from Manyharmonytrees on Etsy. (I just bought this book from her and can't wait for it to arrive.) I have a long way to go with finishing my tree but it's a glimpse into our first nature table. The wooden animals pictured are from mamakopp, as are the mushrooms. The pine trees are from a dollar store find, the crystal I received in a wonderful swapbot swap months ago, and the curly knotted wood was a recent beach walk.
Hopefully this week when Sierra is feeling better we can go for a walk to to collect some items for our table, and then we'll post some finished pictures. Until then, I hope all is well, enjoy the rest of your weekend.
Tuesday, March 24, 2009
Chicka Chicka Boom Boom Cheap Craft
This morning I am home working in the office while Sierra is at daycare. Upon opening up a few large envelopes and throwing them in the recycle bin, an idea came to me.
I purchased a bunch of those ABC fridge magnets at a thrift store a while ago and they have been waiting for the right time to bring them out.
I came up with this activity which I will surprise Sierra with when she comes home: A Chicka Chicka Boom Boom magnet board made from recycled envelopes!

Here's a basic tutorial if you'd like to give it a try!
1) Gather your materials.
You will need:
Two large envelopes from your recycling (Cut open)
Green and Brown shades of paint and paint brushes
Scissors, Glue sticks, pencil
A cookie sheet (Use one you have or I bought this one at the dollar store- 2 for .99)
Edited to add: Make sure if you go and buy a cookie sheet that it is magnetic as not ALL cookie sheet are.
 2) Select some large envelopes from your recycling bin. Mine were a beige colour but really white, yellow, anything will work fine. (We get a lot of large envelopes in the mail with our business)
2) With a pencil trace around a cookie sheet onto one of the envelopes. Cut it out a bit smaller then your line so it will fit inside the tray. You can leave it plain as I have, or you could paint on the ground and sky colours.

3) Take another piece of the envelope and paint it all green. You can add different shades for variation. Paint another envelope with brown. Allow to dry. When they are dry, draw a trunk shape and leaf shape and cut out to be your pattern.

4) Cut out your patterns and lay the trunk on the brown painted paper and the leaf on the green painted paper. Trace 1 trunk and 5 leaves. Cut these out.
 6) Glue your trunk to your paper which fits inside your cookie sheet. Glue on the 5 leaves. It is OK if the leaves extend a bit off of the paper. You can trim them off so it all still fits on the page. As pictured below, I had to snip off one leaf tip.

7) Now place the whole sheet inside your cookie tray. If the corners curl you can secure it with double sided tape so it is easily removed, but stays in place while playing. You could also mac tac the paper for extra durability.
8) Provide some ABC magnets and play along with the BOOK and DVD!
I found this link which provides other Chicka Chicka Boom Boom activities to extend the learning. Do you have any favourite Chicka Chicka Boom Boom activities you'd like to share?
I purchased a bunch of those ABC fridge magnets at a thrift store a while ago and they have been waiting for the right time to bring them out.
I came up with this activity which I will surprise Sierra with when she comes home: A Chicka Chicka Boom Boom magnet board made from recycled envelopes!

Here's a basic tutorial if you'd like to give it a try!
1) Gather your materials.
You will need:
Two large envelopes from your recycling (Cut open)
Green and Brown shades of paint and paint brushes
Scissors, Glue sticks, pencil
A cookie sheet (Use one you have or I bought this one at the dollar store- 2 for .99)
Edited to add: Make sure if you go and buy a cookie sheet that it is magnetic as not ALL cookie sheet are.
 2) Select some large envelopes from your recycling bin. Mine were a beige colour but really white, yellow, anything will work fine. (We get a lot of large envelopes in the mail with our business)
2) With a pencil trace around a cookie sheet onto one of the envelopes. Cut it out a bit smaller then your line so it will fit inside the tray. You can leave it plain as I have, or you could paint on the ground and sky colours.

3) Take another piece of the envelope and paint it all green. You can add different shades for variation. Paint another envelope with brown. Allow to dry. When they are dry, draw a trunk shape and leaf shape and cut out to be your pattern.

4) Cut out your patterns and lay the trunk on the brown painted paper and the leaf on the green painted paper. Trace 1 trunk and 5 leaves. Cut these out.
 6) Glue your trunk to your paper which fits inside your cookie sheet. Glue on the 5 leaves. It is OK if the leaves extend a bit off of the paper. You can trim them off so it all still fits on the page. As pictured below, I had to snip off one leaf tip.
7) Now place the whole sheet inside your cookie tray. If the corners curl you can secure it with double sided tape so it is easily removed, but stays in place while playing. You could also mac tac the paper for extra durability.
8) Provide some ABC magnets and play along with the BOOK and DVD!
I found this link which provides other Chicka Chicka Boom Boom activities to extend the learning. Do you have any favourite Chicka Chicka Boom Boom activities you'd like to share?
Flickr Fun with Wooden Etsy Goodness
OK so I have been viewing all these wonderful mosaic everyone makes on Flickr and I decided I needed to try it. Since I am all about the WOODEN TOY LOVE these days what better choice to start with!
 Starting at the top left side
1) Small Town Toys
2) Syrendell
3) Urastarhouse
4) Black Dog Woodshop
5) Mamakopp
6) You're Inspired
7) Mamaroots
8) Woodmouse
9) Jalu Toys
These are all on my Etsy wish lists! All extremely talented artists!!! How can you not just fall in love with each and everyone of these cute gnomes, fairies, trees, ponds, mushrooms and forest animals? I like this mosaic tool. Have you tried it?
Monday, March 23, 2009
Abiyoyo story and rhythm sticks
Have you ever read or heard the story of Abiyoyo? Here is a little video clip of the story. The Abiyoyo book linked previously is a bit different then the video. The CD has way more music to it. I haven't listened or read this story in ages so I was surprised when Sierra started singing Abiyoyo this afternoon on our walk. (Obviously she is listening to her teachers when she spends time at our Fleetwood daycare as she must have heard it there) We use rhythm sticks with the children at daycare during the chorus of the story, and they ALL LOVE it!
With us being in Richmond at the time, we went to Daiso which is a basically $2 store in Richmond (nothing over $2 unless otherwise clearly marked). We bought some felt, wooden trees, cute earasers and notepads. While we were there we also bought a couple hollow wooden tubes to make rhythm sticks and made these:

If you don't live near a Daiso and can't find hollow wooden dowels you can make your own with a regular wooden dowel (they work the same, the sound is just a bit different). Here's a simple how to:
1) Go to your favourite home renovation store and buy a piece of dowelling (wooden rod). You want a piece that is about 3/4 to 1 inch in diameter and cut to about 8 inches in length. You will need 2 pieces cut. Most places have a table and hand saw set up so you can cut your piece in the store.
2) Sand the cut edges smooth.
3) Draw on a pattern or free hand paint with non toxic paints such as acryllic paint, tempera paints or water colours (since Sierra is only 2 we painted our sticks today with tempera paint).
4) Allow to dry and then seal with modge podge (I will do this step tomorrow). This seals the paint to the dowel and adds a shiny finish. (If you prefer a non shiny finish Modge Podge comes in a variety of lustres. Any wood cream or sealer will also work.)
5) Use your rythum sticks to keep the beat to Abiyoyo, or a favourite tune. Practice your Ta Ta Te Te Ta's....remember those from elementary music calss :)
Here is Sierra painting and singing Abiyoyo

For a more natural look you could just paint a band of colour on one end, or just add on some rub ons for a small design. Even the youngest of children could just add some stickers. However you choose to decorate these I guarantee your children will have fun! Bring out the pots and pans and have a family musical marching band!
For us, rhythm sticks is a good way to introduce following a beat. I also found this cute tutorial on making a small guitar if you'd rather. Either way, I hope you enjoy Abiyoyo!!!
Sunday, March 22, 2009
Is it a bed? Is it a fort?
This weekend I was supposed to be organizing my craft room...however Sierra has had a mischievious weekend and I didn't get much time in my room at all. We instead, went to IKEA. What did we buy?
Is it a bed?

Is it a fort?

Nope it was toy storage organization!

We have a little alcove in our kitchen which is the girls main play area. (We spend most of time in this one kitchen/living/play room. It's the hub of our home) I should have taken a before shot but really it was too embarrassing to. The wall where the storage unit is was littered with bins and bags of toys and then more loose toys scattered all over the floor. Nothing really worked but throwing toys in piles. I was tired of the mess and wanted a better way to promote clean up time effectively.
It's only day one but so far so good! Sierra enjoys looking for the bins to put the toys away properly. She has a bad habit of throwing toys and books so we are hoping this will help promote respect with how we treat our belongings!
I will be taking photos of groups of toys that belong in each bin too so they can see at a glance which toy belongs where without pulling out the bins. I'll try to remember to edit this to add in the completed look when I get the photos done :)
We have books in almost every room in our home. I tried to organize these ones in rainbow colours as seen here. I love the look of her bookshelf. Upon trying to do this myself I realized that most of our book spines are white, but we did manage to get a few lined up here.
Today we also went to the Richmond Nature Park since we were in the area after visiting IKEA. As mentioned earlier Sierra was not in the greatest of moods today and she didn't want to walk so her and Aayla stayed in the stroller. I also didn't have my good camera with me so we didn't get any pictures of the birds as they were too far away.
They both enjoyed the nature house at the park though. It's a neat little place with lots of information there. It's set up to learn through play there with live tanks with snakes, newts and frogs. (They do an animal exploration time, as well as guided tours at the park certain days.) Sierra and Aayla liked playing with the frog game which was set up as Tic Tac Toad! There were puzzles to do, microscopes to explore, bees to watch, stamps of animal tracks, games, fun facts everywhere, taxidermied animals, a mini movie and more!
A couple pics of them having fun at the nature house.


 So if you live near us I recommend a trip the the Richmond Nature Park. It's a great stroller path however I would recommend an All Terrain Stroller trail as there are some bumps along the path. Don't forget to stop by the nature house too!
Saturday, March 21, 2009
Anne Moze Contest
I found another talented wood artist! She is currently running a contest to win some fabulous prizes! The contest is open to US and Canadian residents. Your CHILD must draw or paint a picture for her and snail mail it to her by March 31st! It's that simple. You can visit her site here for all the details!
Edited to add:
I just went back and bought this, this and this! Aren't they amazing!
Edited to add:
I just went back and bought this, this and this! Aren't they amazing!
Friday, March 20, 2009
Friday finds!
Not a super exciting day today. I have been feeling really tired the past couple of days and didn't have a huge amount of energy today so I took it easy. I did find this cute boat set for $5.99 though. I think it originally was meant to be Noah's Ark but it only came with the boat and one of each of a variety of animals. The animals are all carved from balsam wood I think. Most are two layers together to add thickness and then heavily painted. They are a bit folk artish but both Sierra and Aayla have been enjoying them.

The only other thing I bought, you will have to wait to see. I have been wanting to start a nature table.....and that's the only hint you get :)
I want to get my craft mess....I mean craft room organized this weekend so I can start being productive. I'm tired of all work and no play! I want to play! I have so much fun reading so many wonderful crafty blogs and I long to get some things off my to do list done such as make felted eggs for Easter, finish the wooden Easter eggs, try ribbon embroidery, make a nature table, sew some pencil rolls, start making things for the craft show mom and I want to do this Christmas, finish my Kelly Rae Roberts inspired painting I started months ago, make felted playscapes and fairies and gnomes and forrest creatures etc., get going on the garden, try dying some playsilks, try altering dominoes and making scrabble pendant charms. I know there is more but I can't think for the life of me what they are at the moment. I need to go sit and veg with a nice cup of tea. So have a great night and a great weekend. Wish me luck with getting my mess organized so I can be productive once again! Hopefully I'll be back Sunday night with some really good news about a tidy room, and maybe even a nature table!
Thursday, March 19, 2009
Spin Art!
Simple, no cost and LOTS of fun!
 I have to admit this wonderfully simple idea came from one of my staff at daycare. Sierra goes to our Fleetwood centre on days I have to work at the centres or when I have to get actual work done in the office! A couple days ago Sierra came home with a Spin Art painting and we just had to make MORE! (Similar to salad spinner art but this was much simpler for her 2 1/2 year old hands)
All you need is a lazy susan. You can find them quite easily at thrift stores so don't run out and buy one if you don't happen to have one at home.
Paper, paint/brushes, scissors and tape (which should all be in your art cupboard)
To do:
1) Trace around your lazy susan to get the circle shape and cut it out. My paper wasn't quite big enough so I had to improvise and make our circles a bit smaller.
2) Tape the circle to the tray.
3) Choose paint colours. We chose red, yellow and blue so we could watch the colours mix.
4) Spin your tray and touch down a paint loaded brush and watch your art appear!
Sierra loved this and it was so simple. I think a collection of them would make an interesting art display on a large wall.

Sorry for poor picture quality but I wanted to show the blurr of motion :)
 Thanks Andrea for the great idea!
Tuesday, March 17, 2009
Happy St Patrick's Day
Top of the Morning to you all!
In the spirit of St Patrick's Day we woke up and made our Leprechaun hats. This pattern is one I made up for use in my daycare many many years ago. The pattern was made for 3-5 year olds; as you can see it is a bit big on Sierra's head. It works at full size, but you could shrink it down a bit if you wanted too.

Sierra enjoyed painting her hat

Aayla wanted to jump in the painting fun too even though she wasn't feeling well. She's not one to be left out! You can tell by the droop to her eyes though that she is really under the weather! Aayla started out with brushes

but soon gave up for use of her hands.

She managed to cover most of her hat and even allowed me to take one picture of her wearing it.
 I obviously helped her make her band and shamrock, and then forgot to add her ears...oooopss!
Crafty Crow posted this idea that would be fun to make to go a long with my Leprechaun Hats for those of you with older children. It originally came fom No Time for Flashcards which I was just browsing through and it has lots of great ideas! So I am going sign off and have good look throuh it. Enjoy your day!
Oh Yeah here are my patterns: blogger wouldn't upload my scanned images so I had to take a photo of them, but you get the general idea :)


Monday, March 16, 2009
In search of moss
First off... Happy Birthday Chloe! Thanks for inviting us to your first birthday party!
When we left the party it was snowing. When we got home it was sprinkling. The girls were sleeping from the drive home. I was determined to go collect moss today so we headed to the park anyway (both girls still in party dresses, at least Sierra had boots and Aayla had a rain suit in the van). We parked the van and I read about 3 pages before both girls woke up at the same time. The rain stopped, the sun came out and the birds began to sing. It was perfect timing.
We went to Tynhead Park today which is close to our house. We probably only stayed about an hour so it wasn't a big hike today as we were on a mission to collect moss! Sierra was armed with a basket I got at Value Village the other day which was still in the van. (It drives my husband crazy that the back of my van is full of almost anything you might need, and alot of what you probably don't!)
We headed down the trail and found lush green moss everywhere. It was on the ground, the trees, the fence, the rocks, everywhere! We only managed to find two types on the ground that was in abundance, so as to not disturb the park too much.


It didn't take Sierra long to fill her basket. We also collected some pine cones, and small mossy branches.

 "Owwhhh... did you hear that elephant mommy?" Elephant??? There goes that wonderful imagination of hers. She proceeded to tell me a story about the elephants who live in the woods.


When we got home we had to nourish our famished tummies and went straight to work! I have been itching to make one since I saw the one mamakopp made. As a child my mom always had a terrarium going for us. We had a large old fish tank full of moss, small plants, and a mini pond. This was home to many a frog, toad or salamander for short periods so we could observe them and then set them free.
 Sierra adding the water and then some rocks.
 Next comes some dirt. (we don't have a compost so we had to borrow some dirt from our garden)
 We have a visitor, a little lady bug. With a good eye you can spot it on the right side of the bowl, about half way down.
 All done. Sierra made the smaller one and I made the bigger one. She must have spent 1/2 an hour rearranging her figures inside. She had a lot of fun with it.
I sure hope the dampness does not hurt my little figures. I dared not put in wood ones, so I hope it won't be too moist as I will be very sad to loose my elf and deers especially.
 Side views above and top views below

Both other gnomes my mom made. I forgot to take a picture of the knit one by himself. Mom gave me that one for Christmas last year. he wears a little carved bird and button my grampy carved. For my birthday which just passed she gave me the polymer clay and wool felt gnome who is helping a little hurt birdie. See close up below. I think he is superb. Mom is making a family of gnomes and will be selling them on etsy when she gets the family finished.
 I am not sure what my longing is to nature lately. I feel a strong pull to be experiencing nature more and to do more with nature through walks, crafts and stories. (perhaps a midlife crisis, is 37 too young for one?) I guess I just want to try to bring back some of that sense of wonder that I was able to experience as a child, growing up in rural Nova Scotia. What ever the reason, I am glad it is happening, I am thankful that I live in an area which makes it easy to travel not too far, to experience mother nature and all she has to offer. I am fortunate to be able to have the desires within me to realize how important nature is, and how much my children will benefit from it's beauty.
So get up off the computer chair you are sitting on to step outside, close your eyes and feel nature surround you!
When we left the party it was snowing. When we got home it was sprinkling. The girls were sleeping from the drive home. I was determined to go collect moss today so we headed to the park anyway (both girls still in party dresses, at least Sierra had boots and Aayla had a rain suit in the van). We parked the van and I read about 3 pages before both girls woke up at the same time. The rain stopped, the sun came out and the birds began to sing. It was perfect timing.
We went to Tynhead Park today which is close to our house. We probably only stayed about an hour so it wasn't a big hike today as we were on a mission to collect moss! Sierra was armed with a basket I got at Value Village the other day which was still in the van. (It drives my husband crazy that the back of my van is full of almost anything you might need, and alot of what you probably don't!)
We headed down the trail and found lush green moss everywhere. It was on the ground, the trees, the fence, the rocks, everywhere! We only managed to find two types on the ground that was in abundance, so as to not disturb the park too much.


It didn't take Sierra long to fill her basket. We also collected some pine cones, and small mossy branches.

 "Owwhhh... did you hear that elephant mommy?" Elephant??? There goes that wonderful imagination of hers. She proceeded to tell me a story about the elephants who live in the woods.

When we got home we had to nourish our famished tummies and went straight to work! I have been itching to make one since I saw the one mamakopp made. As a child my mom always had a terrarium going for us. We had a large old fish tank full of moss, small plants, and a mini pond. This was home to many a frog, toad or salamander for short periods so we could observe them and then set them free.
 Sierra adding the water and then some rocks.
 Next comes some dirt. (we don't have a compost so we had to borrow some dirt from our garden)
 We have a visitor, a little lady bug. With a good eye you can spot it on the right side of the bowl, about half way down.
 All done. Sierra made the smaller one and I made the bigger one. She must have spent 1/2 an hour rearranging her figures inside. She had a lot of fun with it.
I sure hope the dampness does not hurt my little figures. I dared not put in wood ones, so I hope it won't be too moist as I will be very sad to loose my elf and deers especially.
 Side views above and top views below
Both other gnomes my mom made. I forgot to take a picture of the knit one by himself. Mom gave me that one for Christmas last year. he wears a little carved bird and button my grampy carved. For my birthday which just passed she gave me the polymer clay and wool felt gnome who is helping a little hurt birdie. See close up below. I think he is superb. Mom is making a family of gnomes and will be selling them on etsy when she gets the family finished.
 I am not sure what my longing is to nature lately. I feel a strong pull to be experiencing nature more and to do more with nature through walks, crafts and stories. (perhaps a midlife crisis, is 37 too young for one?) I guess I just want to try to bring back some of that sense of wonder that I was able to experience as a child, growing up in rural Nova Scotia. What ever the reason, I am glad it is happening, I am thankful that I live in an area which makes it easy to travel not too far, to experience mother nature and all she has to offer. I am fortunate to be able to have the desires within me to realize how important nature is, and how much my children will benefit from it's beauty.
So get up off the computer chair you are sitting on to step outside, close your eyes and feel nature surround you!
Subscribe to:
Posts (Atom)