Followers

Wednesday, April 9, 2014

It's official...

As I sit down to write this post I realized I never posted the finished result of our renovations from 3 season cottage to year round home.

Remember THIS post of what our 3 season cottage looked like?

I loved this place the moment we arrived... I love the trees and wooded long driveway.

Eventually we actually did finished the renovations as well! Here are some before and after shots.

Kitchen Before
Kitchen During
 The fireplace and full chimney had to come down
Cabinets, counter top and backsplash went in
 Large floor tiles were laid

Kitchen After

Dining Area Before

Dining Area After
The Kitchen and Dining area together

Living Area Before

Fortunately for us when the window installers broke the new window... it wasn't our fault. All the windows in the house were replace with new windows but due to the size of this bay window we had to just add new dual pane glass to the existing window frame. We did opt out of the slider to have a more clear view.

Living Room After

And can you believe I can't find a picture looking out the window so here is one from the listing. They came last fall to take pictures when we were considering selling but decided to stick it out another winter and see what it was like.

Main Bathroom Before

Main Bathroom finished...it has a full tub as well (you can see the surround in the mirror).
Kids Bedroom Before (This used to be the master)
Kids Bedroom now (excuse the mess)

Master Bedroom Before (was actually two smaller bedrooms)

Master bedroom After

With walk in closet 

The Basement Before was full size but not finished

Straight down the stairs was this

Both sides of the basement got  new regulation sized windows appropriate for bedrooms. Which meant the space had to be enlarged almost double size.

The whole area was properly prepared with moisture barrier, blue studs and proper insulation.
Hardwood floors were laid over top of a properly sealed floor including all the screw holes into the cement floor being sealed properly to prevent moisture in the future.

This area straight at the bottom of the stairs is now my craft room or third bedoom

This area of the basement

Became a fourth bedroom AKA Storage room (panel still needs to be covered).

Downstairs Bathroom Before
Downstairs Bathroom After

This area before was a sink area and had a hotwater tank room in the far corner.
We moved the hot water tank and replaced it with a new gas one (we put the gas in here or rather had the gas company put a line in for us). Here Ian is sitting (Below) where the old Hot Water tank room was and is finishing filing in the whole from the closing off this area. We had to close off the old well line as the city would not permit us to use it because once the house is on the grid, we aren't allowed to reinstall the well. We also plumbed and wired down here for a second kitchen if any one in the future wants to turn it into a rental area or inlaw suite.
The area looks like this now (well different as this is an old picture but it's still the kids play area).
Then the computer area watches over it. This is where the kitchen area would go hence the reason for the high plugs for microwave by window and tall one for the fridge. The sink would go directly under the window...all you need are cabinets and counter top.
The other side of the basement looked like this
We left it open to the play area so it would feel bigger then closed off rooms but it could be made into another bedroom if you added another window for it. Since it was left open we couldn't hide the support column in a wall so we made it into a pillar and this area is now a theatre room. We keep a large mattress on the floor for the girls to dance, and jump and have a wild rumpus on. We love watching netflix here and the girls love their YouTube videos on the big screen too. It was a sanity saver this past winter as we all hibernated.
We also added a laundry room to near the base of the stairs which houses the new hot water heater and the new gas furnace (oh yeah we fully ducted the house too as it was electric baseboards before). We also have a stand up washer and dryer in this room and a stand up freezer but I didn't take a picture of it.

We put in a cement pad outside for our hot tub we brought from BC as it was worth more then we could sell it for at the time so moving it was worth the cost to us.
There is outside speaker wire ready to enjoy some tunes while soaking in the tub as well (and this time the hot tub is staying).

Now that it's finished...we LoVe it! The summers here are amazing! This view is something I will never tire of. It could be cut back a bit to see the preserve across the river from us but we enjoy the view as it is.


Enjoying the peace, quiet and tranquillity of this property.

And we certainly enjoy sitting down at the dock in the sun
And feeding the ducks
Having Mermaid tea parties

Having campfires with friends...both day and night.


 But the winters are just too cold. It's a hard choice to make. This property is everything we wanted. The first winter here we were told was mild and it was manageable Cold for me but manageable). I even thought heck this isn't so bad. Then this winter happened. We had 5 months of snow, snow and more snow. I kept my chin up in the beginning. Through the first couple of months but the wind chill factors in Ontario are horrid. The feels like temperatures of -25 to -40 quite regularly are more then my sanity can handle.
We hibernated. We occasionally went tobogganing, and snowmobiling or enjoyed things like Sledfest and winter campfires but for the most part we hibernated. Hibernating for 5 months took it's toll on us, and on me in particular. I can survive any winter because I am strong enough to do so but why? Why hibernate and just survive and waste away 5 months of a year to have only a few great summer months?

So we have listed our little bit of heaven for sale HERE and we will see what happens... If it doesn't sell we get to enjoy another summer here. If it does sell we get to enjoy a warmer winter next year. Either way we will make the best of it knowing we are still working towards finding what makes us all as a family truly happy.

We do not know where we will go yet exactly if the house does sell. We may go back to BC where the winters are warmer. We may put stuff in storage and hit the road in the RV and travel for a couple years...only time will tell but our hearts will lead the way.

Sunday, April 6, 2014

DIY Littlest Pet Shop Easter Egg Decorations

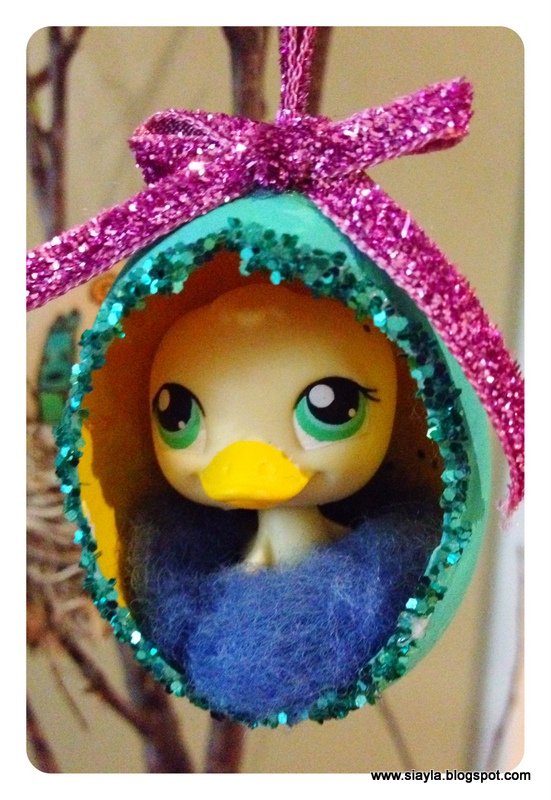
I'm bursting with excitement as I think these are just 'tweet'!
The inspiration for them came from HERE but I must say the added pet shop touch is what I think makes ours so cute! I just LoVe everything about these and I will be packing these away ever so carefully in hopes they will last for many years to come.

To make these your younger children will have to have an understanding of force because if they put too much pressure on these hollow eggs while making them they are sure to break. It's delicate, fragile work but oh so worth the time.

First gather your supplies:

You will need:
-Raw eggs, bowl, butter knife
-Acrylic paint, brush, water dish and paint tray
-Tacky glue
-Glitter
-Felting wool (cotton stuffing if you don't have any, your nests will just be white)
-Littlest Pet Shop or other small toy (if they have magnets on bottom you may also want a magnet to glue in your egg)

You will also need ribbon, scissors and a glue gun which I forgot in the picture

This project will take a bit of time and there is waiting between stages so be prepared to not finish it all in one sitting.

1) Hollow out your eggs as shown below. To do this you want to tap the side of the egg very gently with something you have on hand like the end of a butter knife as I did below.

After you have poked in a rough oval shape you need to pick out the broken bits carefully. You may need to carefully chip away the edges until the hole is the size you want.

Wash your egg and gently rub the inside of the egg. The inner membrane will rub loose so you can peel it off.

The last step is to carefully trim around the oval to smooth out the edges. You must be extremely careful doing this and  cutting with the tip of your scissors works the best. Don't try to make it perfect. It's imperfections will not hinder the beauty of your final project. Set aside to dry.
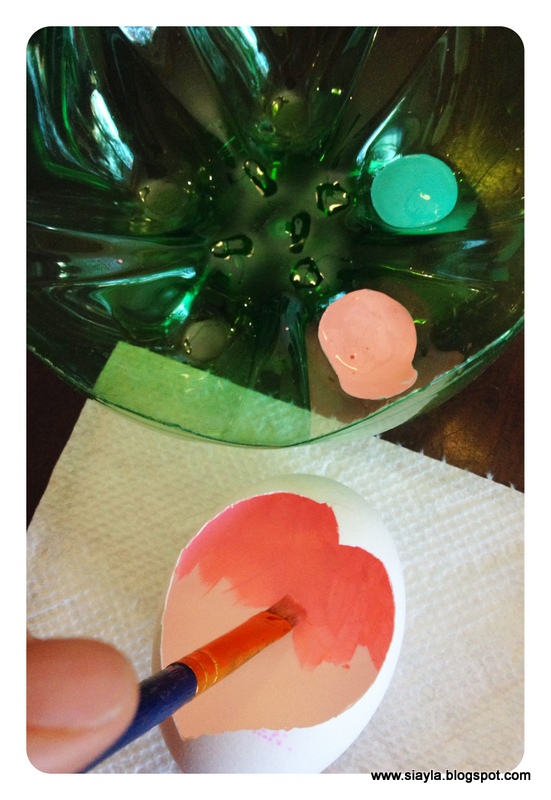
2) When you egg is dry it's time to paint it. You want to choose two different colours. I chose pink for the inside of mine and turquoise for the outer shell.

FYI Cut off the base of a 2 litre pop bottle and it makes the perfect paint tray for five colours or less.

At first my girls didn't feel like making these but as soon as I started painting, they jumped right in. Sierra and Aayla both wanted turquoise and yellow but they reversed where they put their colours.

3) When you have painted your egg shell inside and out you need to let it dry completely.

4) Once your egg is dry, make a trail of tacky glue around the edge of the opening. It must be a tacky glue. Regular glue is too runny and won't hold it's shape (by the way...my egg broke it'self into a heart shape. I probably couldn't have done that if I had tried).

5) Next sprinkle on some glitter in what ever colour choice you want. If you sprinkle over a plate or a piece of paper it is easier to put the extra glitter back into the bottle so as to not waste it.
Want a neat clean up tip for the glitter that escapes the plate and hits the table? I do not remember where I first saw this...somewhere on facebook I think...but it's brilliant (and I can't claim ownership of the idea). Use play dough! Dab up the glitter (which is notorious for getting every where) with the play dough and you now have a clean table and cool glitter play dough to play with!

6) This time while your glue and glitter is set aside to dry you can at least have fun with your new glittery play dough.

7)  When the glue and glitter is dry take a small chunk of your felting wool or cotton stuffing and roll it into a small flat circle shape. If you have felting needles you can shape it to be more nest like. If not it will be just fine.

I originally planned to glue the pet shops into the egg (my girls didn't like that idea). Luckily all the duck/chick pet shops we had to use, had magnets on their feet. Instead we hot glued a magnet to the base of the egg so the pets could be removed and played with still.

Add in your felted nest, add your pet and turn the egg upside down to make sure the toy is either securely glued or magnetized in place. We had to dig out a little centre in our nest as the magnets were not strong enough to hold the pet shop in place when the wool was too thick.
8) Hot glue a ribbon loop to the top of the egg to be the hanger and glue on a bow. They are now ready to hang. We used a glittery ribbon because I happened to have some in my stash of supplies and you can never have too much glitter!
All our Littlest Pet Shop Eggs hanging on our Egg Tree

So what do you think? 'Tweet' right?

Saturday, April 5, 2014

Making Wooden (Faux) Pysanky Easter Eggs


What I like best about the wooden Pysanky eggs is they last for years without fear of them breaking. I have a wooden Pysanka egg that was given to me from a neighbour of my Nanny Cabbage rolls when I was little (She had the nickname Nanny Cabbage rolls because she made the 'bestest' cabbage rolls in the whole wide world!). I also have a wooden egg that my grandfather made (he was a carpenter) and my grandmother painted back in 1982. These are two treasures of mine in our Easter decoration box as well as a few bunnies and things.
 

What are Pysanky eggs? Click HERE to learn more. Also at the very end of this post there are a couple links to DIY's for intricate, simple and faux designs on real eggs.

We might try it again this year but today we decided to stick with wood burning wooden eggs. I happened to score a bag with a dozen wooden eggs at the thrift store a couple weeks ago...yeah! It gets better...I had a 30% off coupon to use :)
To make your wooden Pysanky eggs you will need:
-Water colour paints ( I used liquid but tempra blocks will work too or regular water colour paint)
-Small paint brushes and a water container to rinse brushes before switching colours
-Wooden eggs
-Pencil
-Wood burner

1) Plug in your wood burner to heat up.

2) I find it easiest to draw your design on your egg with a pencil first. This way you can make changes if you need to.
3) When the wood burner is warmed up carefully use it to draw along the pencil lines.

 ***I recommend an adult do this part. Your older child may be able to this part but I did the wood burning for my 7 year old so she didn't slip the tool off the egg and burn herself.***

As you can see I am not very good at using the wood burner. I think I have the wrong tip and really should look into buying a proper tip. The wood burning takes some time to do and the round surface and curvy designs are challenging. Also there is no way to fix a mistake so go slow and careful. You may want to sacrifice an egg to practice a bit first.

4) Using the water colour paints and a small paint brush carefully paint your designs.

 Be careful not to have too much paint on your brush or your paint may bleed out onto other parts of your egg as shown below with the heart.

5) It is also best to either do all of the small designs first or the background first and wait till they are dry before starting the other area or paint blending might occur. In this picture I am painting the background first then when it was dry I went back and painted the smaller design spaces.

6) Voilà! Beautiful wooden Pysanky eggs. Sierra chose to leave her backgrounds natural on her two eggs.

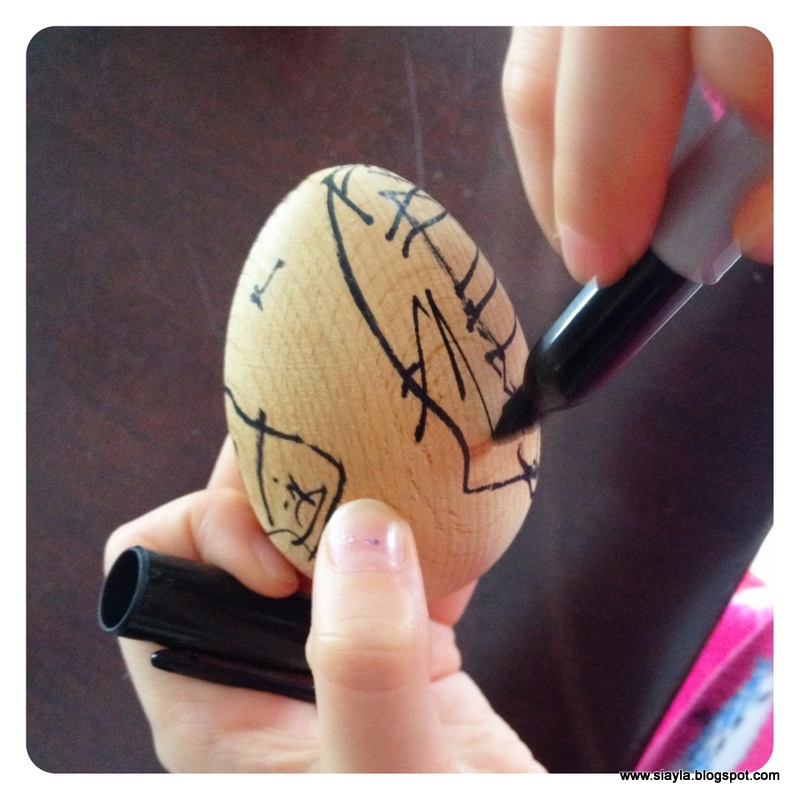
If you don't have a wood burner but would like to try making these wooden eggs it is possible to do so using a permanent marker instead of the wood burner. I started with pencil first and then use the marker. Any pencil lines showing can be erased before painting.
Aayla just used the marker directly on the egg.
Next you paint the same as above.


Aren't they all so beautiful? Even though my wood burning skills are not the greatest in the end the finished products are beautiful keepsakes to have for years and years.

And look at these other awesome ideas for wooden eggs:

Disguise an egg
SOURCE with printable for disguises
Make Humpty Dumpty's
SOURCE
Make Story Eggs
SOURCE
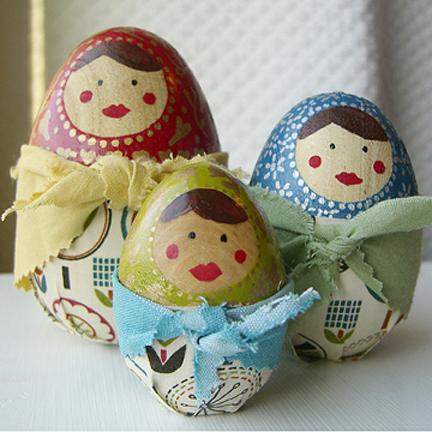
These Matryoshka wooden eggs are adorable
SOURCE
Make Hina dolls
SOURCE
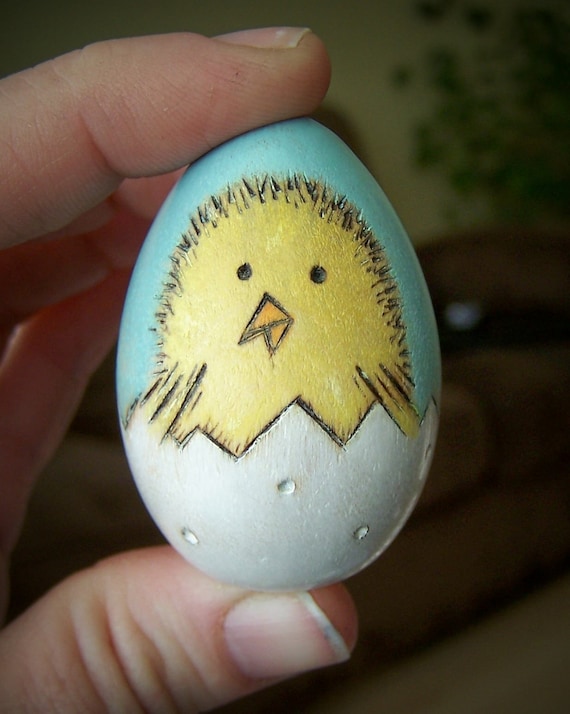
This chick in an egg is from etsy for $12US but isn't it adorable?
SOURCE
I LoVe that all these wooden egg ideas are great gifts and they can be treasured year after year.

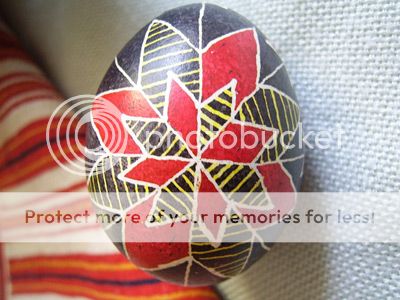
If you want to make real Pysansky HERE is an egg-cellent tutorial to make intricate eggs like these:
Source
If you aren't brave enough to try an intricate design, then THIS post has a DIY with designs that are more simple.
Source
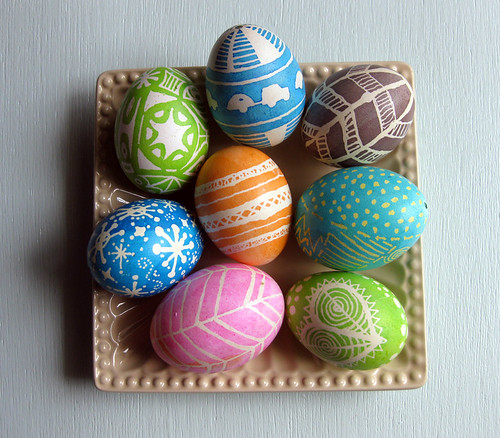
Last but not least an easy way to get the intricate designs without the beeswax by just drawing on your designs with markers.
SOURCE


Do you make Easter eggs? What is your favourite type to make?