
To make these your younger children will have to have an understanding of force because if they put too much pressure on these hollow eggs while making them they are sure to break. It's delicate, fragile work but oh so worth the time.
First gather your supplies:

You will need:
-Raw eggs, bowl, butter knife
-Acrylic paint, brush, water dish and paint tray
-Tacky glue
-Glitter
-Felting wool (cotton stuffing if you don't have any, your nests will just be white)
-Littlest Pet Shop or other small toy (if they have magnets on bottom you may also want a magnet to glue in your egg)
You will also need ribbon, scissors and a glue gun which I forgot in the picture
This project will take a bit of time and there is waiting between stages so be prepared to not finish it all in one sitting.
1) Hollow out your eggs as shown below. To do this you want to tap the side of the egg very gently with something you have on hand like the end of a butter knife as I did below.
After you have poked in a rough oval shape you need to pick out the broken bits carefully. You may need to carefully chip away the edges until the hole is the size you want.
Wash your egg and gently rub the inside of the egg. The inner membrane will rub loose so you can peel it off.
The last step is to carefully trim around the oval to smooth out the edges. You must be extremely careful doing this and cutting with the tip of your scissors works the best. Don't try to make it perfect. It's imperfections will not hinder the beauty of your final project. Set aside to dry.

FYI Cut off the base of a 2 litre pop bottle and it makes the perfect paint tray for five colours or less.
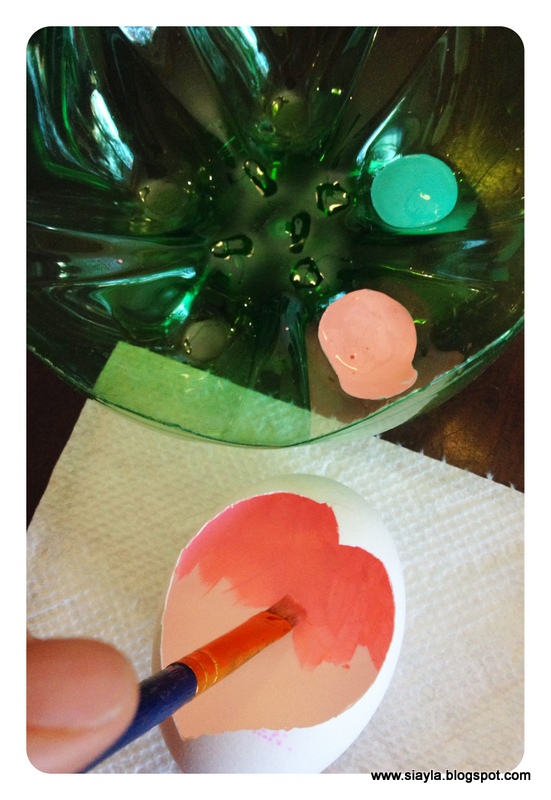
At first my girls didn't feel like making these but as soon as I started painting, they jumped right in. Sierra and Aayla both wanted turquoise and yellow but they reversed where they put their colours.


3) When you have painted your egg shell inside and out you need to let it dry completely.
4) Once your egg is dry, make a trail of tacky glue around the edge of the opening. It must be a tacky glue. Regular glue is too runny and won't hold it's shape (by the way...my egg broke it'self into a heart shape. I probably couldn't have done that if I had tried).

5) Next sprinkle on some glitter in what ever colour choice you want. If you sprinkle over a plate or a piece of paper it is easier to put the extra glitter back into the bottle so as to not waste it.


6) This time while your glue and glitter is set aside to dry you can at least have fun with your new glittery play dough.
7) When the glue and glitter is dry take a small chunk of your felting wool or cotton stuffing and roll it into a small flat circle shape. If you have felting needles you can shape it to be more nest like. If not it will be just fine.
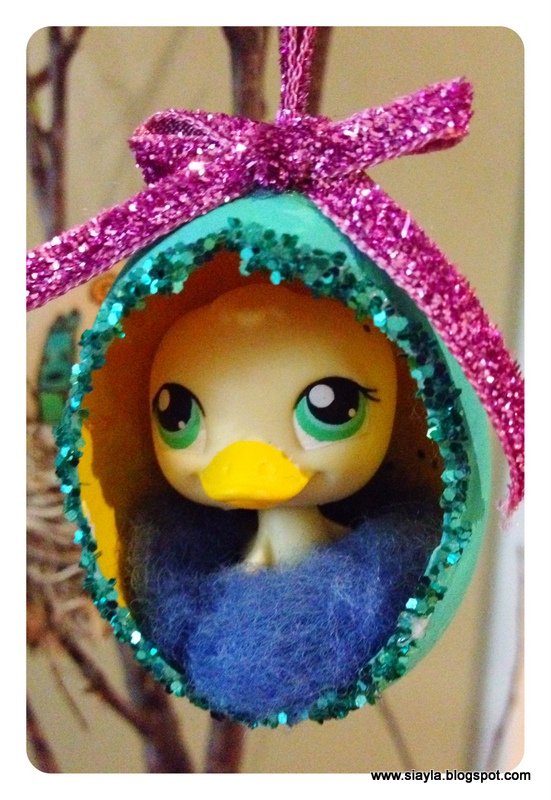
I originally planned to glue the pet shops into the egg (my girls didn't like that idea). Luckily all the duck/chick pet shops we had to use, had magnets on their feet. Instead we hot glued a magnet to the base of the egg so the pets could be removed and played with still.
Add in your felted nest, add your pet and turn the egg upside down to make sure the toy is either securely glued or magnetized in place. We had to dig out a little centre in our nest as the magnets were not strong enough to hold the pet shop in place when the wool was too thick.


 |
| All our Littlest Pet Shop Eggs hanging on our Egg Tree |
So what do you think? 'Tweet' right?
No comments:
Post a Comment
Thank you for taking the time to leave a comment! I love reading them, and visiting your blogs too :)