
Here are some simple ideas you can do with your children using a few thing from the dollar store (some things you have at home already too) and all are perfect for Easter.
This post includes information to make the following: (so keep reading down)
-Tatttoo eggs
-Playing with Easter erasers:
-matching colours & shapes
-patterning
-sequencing
-printing making craft ideas
-Egg Tangram
-Playdough eggs
-Plasticine art
-Carrot necklace
-Carrot sensory bin
-Bath time fun with foam
-Plastic eggs:
-sorting by size & colour
-patterning
-making music, creative movement ideas and recognizing and expressing emotions
-chick and egg matching
-making Egg animals
FYI I have recieved no compensation for this post. I only mean to share ideas my children have loved making this year from simple items purchased at dollar stores.
Normally I don't cover our table for most of our activities but because we plan on making a variety of eggs using dye this year I picked up the blue Easter table cloth for $2 from the dollar store.


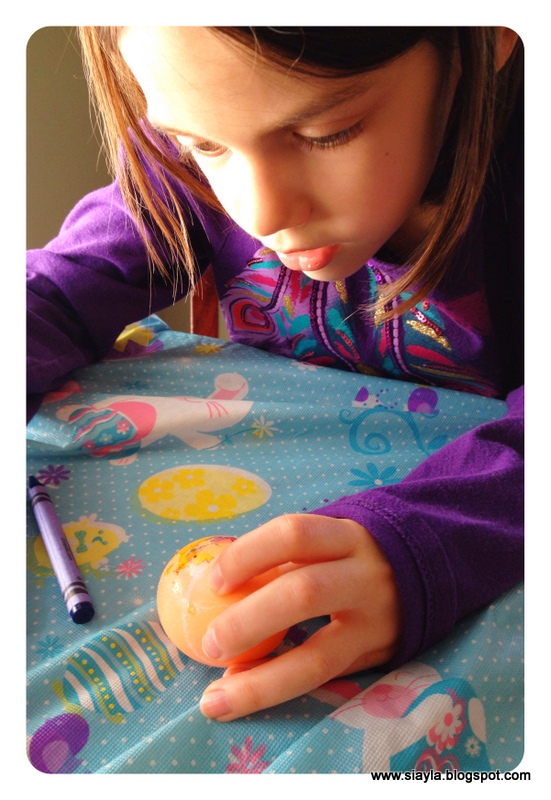
Next make your dye according to your package instructions or make your own home made dye from natural ingredients. Dye your plain eggs and set aside to dry. Cut out your tattoos and chose which one you want to make first.
 |
| Girls are choosing their tattoos for their eggs |


After a minute or two, lift off the paper towel and carefully remove the paper backing from the tattoo. Your tattoo will be left in place. You may need to pat down any edges that lifted while removing the paper. Just tap it with your paper towel gently.

We learned that smaller tattoos work better then larger ones but they were still fun to make. Also younger children can have a hard time holding the tattoo still while pressing the paper towel down on top of it and smudges and tears can happen to your tattoos.
 |
| Small tattoos worked best |
 |
| Surprised her tattoo slipped and crinkled |
I picked up a package of Easter erasers and was surprised at how many ideas these can be used for.

You can order them for sequencing practice to see what comes next. This can be done over and over again. You can also lay the patterns out on a photocopier and print out sheets as I did HERE for Valentines day before but I am still out of ink so I couldn't print a new one to show you sorry. I also used the erasers in a sensory bin in that post as well.

Our favourite way to use the erasers was as stamps. If you stamp them on a washable ink pad they make wonderful printed designs for a paper egg, or a card.


Earlier in the month we made these Egg Tangrams from transparent index folders which were $1 at the dollar store. See how HERE. The 9 shapes within the egg can make numerous other shapes. We made a set for the light table but they can easily be used on a table top.

Playdough can be homemade (My recipe HERE) or purchased at the dollar store. When decorated with craft gems $1, glass baubles $1 and fake flowers (depending on how many varieties you want roughly $2-$3) you can create beautiful Easter cookies. I had these all on hand in our craft supplies so the prices above are a guideline from past purchases. Our flowers actually came from thrift stores.

Plasticine can also be purchased for $1 for a variety pack from the dollar store. If your child draws an egg shape on paper, (or you draw one for them) they can fill it in with the plasticine instead of, or as well as, colouring with markers. Gluing on pieces of crumpled up tissue paper would also be a great way to cover an egg shape.

I found some powdered candy carrots at one dollar store and I really didn't know what I was going to do with them but I knew something would come to me. We ended up making carrot necklaces.

 |
| Sierra putting on her carrot necklace |
 |
| Aayla trying out the powdered candy |
 |
| Bunny Sierra having a nibble of her carrot |


A variety package of fun foam for $1 is a great way to make bath time extra special with a simple egg shape and hand cut shapes. You could also purchase another package ($1 ours were left over from another project) of precut shapes if you didn't want to cut your own pieces by hand. The water makes the pieces cling to each other and the side of the surround. Easy to reuse over and over again, just wet again and stick in place.

Plastic eggs are great for many activities. You can get assorted eggs and assorted sizes for $1-$2 per bag at the dollar store.
I bought eggs with designs on them to make a simple matching game. Just cut your eggs apart so they are two separate pieces. Your kids then try to complete an egg by putting the correct two halves together.

As well as sorting patterns, plain colours can be sorted as can different sized eggs.
 |
| Sorting eggs by size with one colour only |
 |
| Sorting eggs by size and colour |

This set of eggs with different emotional faces were the most expensive eggs that I bought at $2 for the bag (they were also the most fun). We added a bit of rice to each egg, taped them shut and made musical shakers.

Since these eggs had emotions on their faces, we picked up an egg...or two, and discussed how the egg might be feeling by looking at their expressions. We then turned on some music and tried to dance like the egg felt while shaking the egg to make music.
The happy, excited and crazy eggs were easy. The sad egg was a bit harder to dance to and all were comical to watch and do. Sorry for the picture quality but it was hard to capture the dancing with my phone camera.


A few years ago I found a package of little Easter chicks at the dollar store that were rainbow coloured and we made THIS cute little matching game with them. Cost $1 for eggs and $1 for cute coloured chicks.

I wish I bought more of those chicks as I have never seen again and I'd love to have some more. Instead you could make pom pom chicks to go inside them by adding googly eyes and felt beaks to a pom poms to get the same affect just not quite so simple (or cute) as using the package of Dollar store chicks.
You can use them to make Egg Animals. See how we made ours HERE.

My total cost for all these activities was $8 for an assortment of plastic eggs, $2 for a table cloth, $2 for a dye kit, $2 for two packages of powdered candy carrots, $1 plasticine, $1 for index cards, $1 set of tattoos and $1 for a package of twelve erasers. So for $18 (plus tax) we have had a lot of fun, created many beautiful crafts, spent hours sorting, patterning, sequencing, building fine motor skills, developing visual perception and strengthening thought processes. Keep in mind we had some of the basic craft supplies already on hand like gems, flowers, pipe cleaners, googly eyes etc but the new purchases only cost $18. A steal really when you see how much we have learned while doing these activities.
What other great learning ideas have to found at the dollar store?
No comments:
Post a Comment
Thank you for taking the time to leave a comment! I love reading them, and visiting your blogs too :)