I have always had secret LoVe for Matryoshka Dolls aka Nesting Dolls. I have a mini collection of them which have mainly come from thrift stores.
This one my mom gave Meadow when she was little.
This one I got for Sierra when we were on our Alaskan cruise in 2007 (someday I do a past post and actually post some pictures of that trip).
Aayla's is probably my favourite and was a thrift store find for $3.99.
It has all 7 dolls in perfect condition and still has the original sticker on the bottom (as does Sierra's).
All the rest have been thrift store finds and every time I'm at a thrift store my eyes continue to be drawn to these sweet little dolls.
When watching the Olympic snowboarding I saw this Matryoshka statue:
I thought it was such a sweet touch and an important part of Russia's culture. It made me happy just to see it on the slopes. I knew it was time to bring all our nesting dolls out (they have been packed away since moving to Ontario) and pay our own tribute to these fantastic toys that have held the test of time.
First we brought them out to just play with. Opening up all the dolls and setting them all up. Counting how many children were inside of each doll, and arranging them by size.
Then we dumped all the separated pieces into a bowl.
We then had the task of sorting through them and putting the correct tops and bottoms together. This proved to be a fair bit difficult as some of the dolls have different colours and designs, within the same family of dolls while other doll families were similar to each other. After a few tries, Aayla got them all back together.
While Aayla was putting all the dolls back together I did a quick internet search for Matryoshka dolls and found this image
Which took me to Deep Space Sparkle and
THIS idea and we were off!
I used the pattern above but enlarged it and then traced out 10 different shapes from the combined pages (I had to hand draw a couple of the smaller ones, guess I could have shrunk the pattern but I didn't think of that at the time). I left all the features blank so my girls could draw on their own facial expressions and designs on the bodies. I made 10 different sizes so they could choose the sizes for their family members to be added to their paintings.
Sierra wasn't interested in art today but Aayla and Kodey (our neighbour) were all over it!
Aayla ended up colouring the larger dolls and Kodey coloured the smaller dolls on hers so I made a colour copy of both for another counting activity which I'll show you after these paintings are finished.
Next we made water colour backgrounds the same way we made our
water colour Valentines.
While the paintings were drying Kodey coloured a couple more dolls. We cut the dolls out to represent each member of our family and glued them to our paintings.
Super cute!
When these paintings were finished I took the photocopy of Aaylas big dolls and Kodey's smaller dolls I mentioned earlier and glued it onto a pizza box and cut them out.
I then added numerals to the dolls bellies, put out a bowl of small pom poms and it became a counting activity.
Sierra decided to join us and used some of the scrap dolls that didn't get coloured and used them to spell out Kodey's name.
She then glued them onto a piece of paper and made a sweet picture for Kodey.
While Sierra was doing this Kodey and Aayla went back to enjoying free play with the dolls. They became friends of the pet shops and the barbies and had a grand time.
I was actually surprised at how many wonderful activities I found for Matryoskha dolls with a simple internet search. Here are some of my favourites:
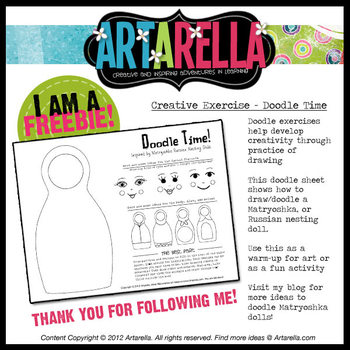
1) Need some practice drawing Matryoshkas before you tackle a full project? Here is a doodling tutorial for download.
2) Making Learning Fun has a whole assortment of Matryoshka doll activities ranging from sizing, symmetry, ABC sound matching, puzzles and more. All found
HERE.
3) There is a post on this Russia Unity Study
HERE which also has a set of paper nesting dolls that fit inside each other.
4)
HERE is a birthday party theme of Matryoshkas. Decorating these cookies look like lots of fun.
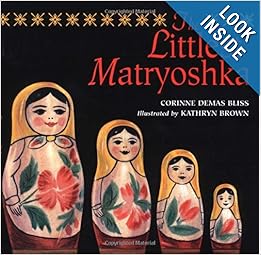
5) I haven't read this book yet
but it is on my to look for list now as after reading
THIS post by Mamaroots I need to read it. I refuse to buy books new...in time I will find one at a thrift store.
6) This banner is so sweet and the pattern could be made into felt story pieces :)
7) Mom to 2 Posh Lil Divas has a post on Russian folklore and stories and these cute nesting dolls.
8) These stone Matryoshkas are just adorable.
9) I LoVe this idea by Let's Go Fly a Kite to celebrate and decorate for this years Olympics. The life size Matryoshka is just adorable.
10) If you are looking for some FREE Olympic curriculum resources here is a great set available for download.
I found a couple other ideas but hope to make them in the next couple of days and then I will share :)