Followers

Tuesday, November 22, 2011

Legend of the Poinsettia Book+Craft=FUN

After finishing our snowflakes I had an idea to make poinsettias for Christmas to go along with the book the Legend of the Poinsettia by Tomie dePaola. They didn't quite turned out how envisioned but they add some brightness just the same.
 

They are fairly simple to do. They don't look as much like poinsettias as I hoped but I think they are still pretty :)

All you need is coffee filters, water colour paints, scissors, marker, paintbrushes, pipe cleaners, doilies, and newspaper.

First paint your coffee filters with a red water colour paint. We used Sargent Arts glitter water colours to give them a bit of sparkle too. I always dilute the liquid water colours so they spread easier and last longer. Set aside to dry.

Now paint a small doily (our doilies were 4 1/2"in diameter) with yellow water colour paint. You can add a bit of red to give it an orange tint too if you want.

If you paint your doilies on a sheet of newspaper then you can just add more paint to it when your doilies are finished as you need some painted newspaper.You can keep it all yellow or add some red to make orange and set aside to dry.


When your coffee filters are dry you start out the same way as you did with the snow flake by folding it in half, then half again, and then half it a third time (see picture below).
You can cut the petals freehand or you can draw them on for smaller children as shown below.
Next take the painted newspaper and cut it into a circle shape that is slightly smaller then the doily. Fringe the edges with scissors as shown below.
Next push a pipe cleaner through the center of the coffee filter, then the doily and then the newspaper circle. Twist the pipe cleaner on the front and the back to keep the flower steady.
Scrunch up the whole flower with your hands. Open your flower back up making sure not to completely flatten it. You want it to have some depth.

Volia!  A beautiful Christmas centerpiece! They might be better left white with orange and yellow centers to be narcissus is you wanted them to be more Christmasy looking as they didn't really turn into poinsettias but they are nice and cheery for a winters day craft :)


Easy Coffee Filter Snowflakes

I'm trying to embrace the fact that winter is on it's way and put a fun spin on the white stuff the kids love so much! Since our snow outside is melting the girls asked if we could bring some inside so we decided to make some snowflakes.

Here is a super simple way to make snowflakes. An easy twist to the regular paper ones :)

All you need is coffee filters and scissors to make them (wax paper, white glue, sprinkles, paint brush and water if you want to complete the activity how we did). Younger kids may want to draw on their design with a marker or pencil first before cutting.

First follow the picture below to fold your coffee filter. Fold the filter in half, then half it again, and then once more. Now you can either draw on a design to cut or cut freehand. I usually just freehand it but I drew one to give you an idea for design. Open up your snowflake carefully and see what master piece you have created.


Take note of the bangs...and don't turn your back on a 5 year old with scissors...
she may get static hair and decide to cut it out!!!


When finished we decided to give them a bit of sparkle so we glued them onto wax paper with a diluted glue solution of about half white glue and half water. Then we brushed the glue solution onto the wax paper. Don't worry, the solution will bead a bit as the wax paper is too smooth. Lay down the snowflake carefully and then brush on a layer of the glue mixture. Sprinkle with glitter.


Allow to dry and then cut around the snowflake and hang in your windows, or walls or where ever you want. You could make smaller ones which would be perfect for tree ornaments.

Monday, November 21, 2011

Whoooo hoooo I WON

A few days ago I came across THIS post over at Whipperberry and I WON!!! There were 2 winners for this contest...


#1 Ellen who said, "Ooo what a fun night! I think we'd follow your lead & have a Christmas crafting night. I'd like to make some special gift tags for my family. Thanks for the lovely giveaway!"
#2  Brooke who said, "I follow Whipperberry, your in my side bar :) and now I follow Elmer's on Facebook. If I were to win my theme would be a kids Christmas party where I would get kids together in the neighborhood to make gifts for their family."
Congrats my friends… You're going to love this prize pack!!


I can't believe it! I am so excited! I'm off to start thinking about what wonderful things I can make with some local kids as their gifts to their families this Christmas season :)

Thanks again Whipperberry and Elmers! I'll be sure to post and let you know what we all created :)

Sunday, November 20, 2011

Winter Rabbit Book + Craft=FUN

It snowed briefly here the other day and is disappearing almost as quickly as it arrived. With the snow comes feelings of winter especially since the leaves have all fallen and their limbs are all bare. Fall is my favourite season. I LOVE when all the the leaves change from their greens to their warm oranges, reds and yellows, and when the sunlight is just right...life is perfect! If it weren't for the Christmas season I would not like winter at all with it's snowy cold and wind...even here in Southern BC I get cold. (I grew up in Nova Scotia and left partly due to the cold winters)

Since I was feeling a little glum from the weather I decided I should try to make the snow positive and I looked towards the book shelf for inspiration. What better way to beat the winter blues then to be inspired by the horrid white stuff!

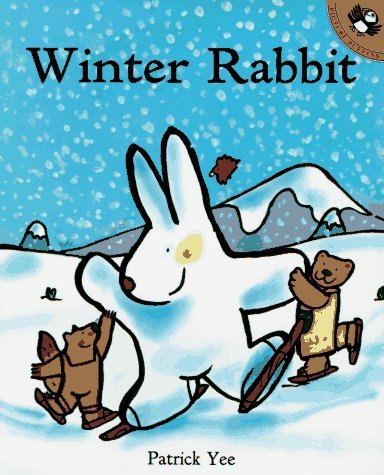
I haven't dug out all the winter items yet but we did have a copy of Winter Rabbit by Patrick Yee on our bookshelf.
So we read the story and then got out some paper, glue, scissors, markers, pastels, cotton balls, pipe cleaners, goggly eyes, something for the nose (we glued on a pink pony bead) and set to work.

First I let the girls pick out a rabbit shape from the book and drew it for them.(your child could draw their own rabbit if they want or you could trace a picture from the book if you prefer) and they cut them out, glued them onto a piece of blue construction paper and covered the rabbit by gluing on cotton balls. Add a face to your bunny with googly eyes, pony bead and a pipe cleaner mouth.

Use the pastels to draw on snowflakes falling down.


Simple...fun...book + craft. Easy fun for any afternoon! The girls had so much fun we are going to do Book+Craft=FUN on a regular basis so check back soon for more book + craft posts!! Enjoy

Saturday, November 19, 2011

Color Me Mine Langley BC

Today was the Grand Opening of "Color Me Mine" Langley. If you haven't been there yet you should go and check it out! Go for an afternoon of creative fun with your little one! They have a huge variety of affordable gifts you could have your little ones paint for grand parents or teacher gifts. They also do parties if you have a birthday or special occasion. Check out their website too as they have monthly events!!! They also have the rights to a lot of Disney characters!

We picked up a friend of Sierras from school for a fantastic play date day! Here is how we spent our day at their grand opening (I forgot my camera...thank goodness for cell phone cameras):

We painted of course!!!


Got fake tattoos

Faces painted


Got Balloon mermaids

They did a great job at their grand opening and I would recommend them as a great place to go!